how to draw 3d cube 2 point perspective
How to draw a cube: 3 different ways and perspectives
How to depict a cube: learn three common ways to show three dimensional cube on a flat newspaper - simple 3D view and i point and 2 betoken perspective.

The outset way how to draw a cube is a simple view. This is an easy style to propose infinite and draw a three-dimensional shape on a flat newspaper.
Although a bit harder, learning how to draw a cube in 1 point perspective makes it looks more realistic – like a real object in space.
A cube in 2 bespeak perspective is a very dynamic and exaggerated view, which actually makes the flat drawing pop out to the 3rd dimension.
pencil
,
eraser
,
color pencils
drawing newspaper
or
sketch book
Dearest drawing? Never miss a tutorial!
How to depict a 3D cube in simple cabinet view
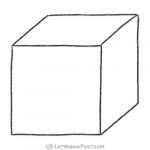
Our first cube is fatigued in a simple 3D chiffonier view. This is an like shooting fish in a barrel way to suggest depth and depict a three-dimensional shape on flat paper. Let's get into it!
3D cube cartoon
Step i: Draw a foursquare

Start cartoon a cube with a simple flat foursquare. This will exist the front side of your cube. In this tutorial you lot will surely get some good practice cartoon straight lines. Make all the sides of the square the same length, and try to keep the right angles as straight as you lot tin can!
Footstep two: Add together the side edges

Add iii lines, one in each of the top and correct hand corners. Make all the lines the same length over again. You lot can play with the angle at which you draw the lines. We have drawn the lines at a roughly 45-degree angle here. That gives usa the about typical view of the cube, where you tin see both the top and right side. Merely plow the side lines more up, or to the side (flat) – and you will become very different views of the cube. Just brand sure that all lines are the aforementioned length and at the same angle.
Pace 3: Draw the rear edges to finish the cube

Consummate the cube past adding the concluding ii edges. These are, again, the same length as our original foursquare. One runs vertical (left to right), and one horizontal (meridian to bottom).
Explore: How to draw a cube from different angles
Top-right view

Now that you know how to describe a cube in the basic view, effort playing with dissimilar angles and views. Hither is the complete cube you lot have just drawn. Since we have extended the angled lines upward and to the right, you can meet the top and right manus sides of the cube.
Top-left view

Simply if you cull to extend the angled lines up and to the left, you flip the cube so that you see the top and left paw sides of the cube. Notice that the bottom side line is at present coming out from the other side of the cube also.
Bottom-left view
You can likewise draw the sides pointing down, and get a view in which we see the cube from the lesser up. And if you lot desire to use your new cube-cartoon skill for a real drawing, jump direct to "How to draw a robot" tutorial.
Like this tutorial? Share it with others:

How to depict a cube in ane signal perspective

A slightly more avant-garde way to draw a cube is with 1 betoken perspective. The resulting cube is very similar to the uncomplicated way nosotros have used above, just slightly more squished. Although a bit harder to depict, the event looks more realistic – like a real object in infinite. That is what perspective does – it is a fashion to show infinite on the flat paper. Let'due south get cartoon!
Drawing a 1 point perspective cube
Step 1: Draw a square and the vanishing indicate
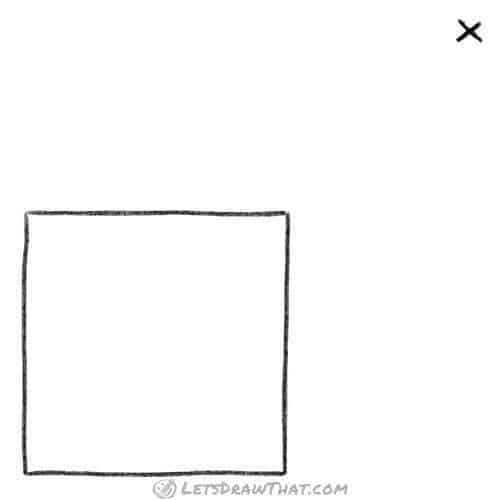
Start as earlier with the forepart square face of our cube. Next, mark the point into which our perspective will merge. This is called the vanishing indicate. Here nosotros accept put it in the peak right corner, that way we will get a view which is similar to the one we have drawn above. Once you accept fatigued a cube the way we have shown here, play with the placement of your vanishing point. Moving it further down or to the left volition requite you a very dissimilar view of the cube.
Step 2: Draw the perspective guidelines
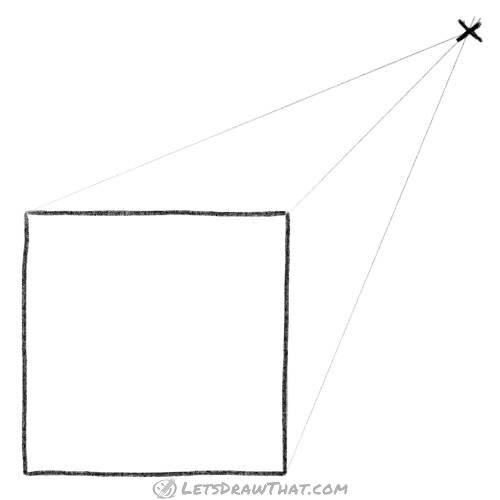
Side by side, depict the perspective guidelines. They all start at the top and right corners of our front face square, and merge into the vanishing signal. (It is called the vanishing point because objects go smaller the closer they get to the point. At the vanishing bespeak objects would exist so small that they vanished.) You lot tin can utilise a ruler to describe your lines like we did, if yous have one on hand. It makes the job a bit easier. Also, draw the lines just lightly – they are there only for guidance and we will erase them later.
Step iii: Describe the far edges of the cube
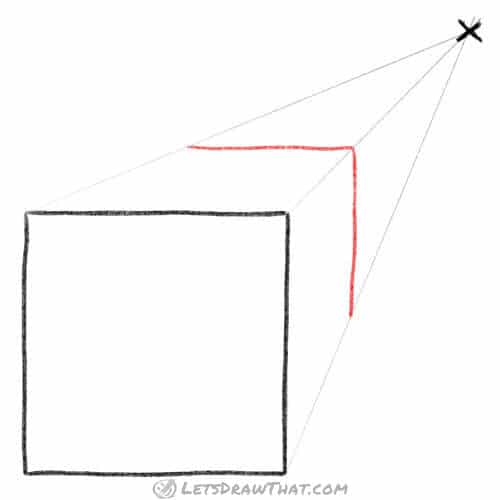
With the guidelines in place, draw the far edges of the cube. Both edges offset and finish at the perspective guidelines. First, draw the superlative far edge – parallel to (in the same direction as) the horizontal tiptop line of the front cube face. And so draw the vertical (summit-down) far edge – once again, it follows the direction of the top-downwards side of the front end confront. Yeah, here are some fancy words you lot have just learned:
"Parallel" lines are 2 lines going in the same management.
A "vertical" line is a line going from top down.
A "horizontal" line is a line going from left to correct, aforementioned equally the "horizon". And "horizon" is the line where the earth meets the sky, if y'all look far into distance – the line that goes flat left to right.
Step iv: Depict the side edges to complete the cube

After a short linguistic detour, nosotros're back to cartoon a cube. This is an easy pace – merely outline the perspective guidelines between the front end and rear face of our cube to complete the cartoon.
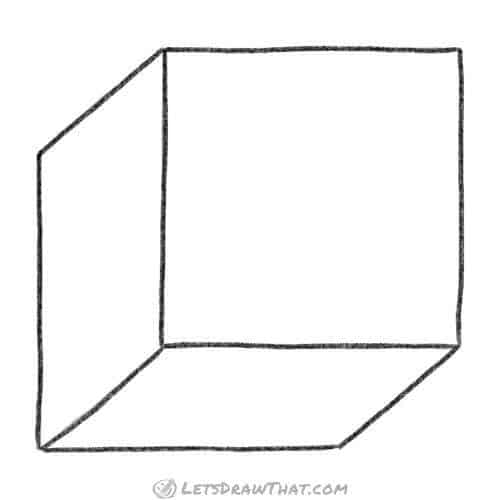
How to draw a cube in i point perspective: finished drawing
Finished cube in i indicate perspective
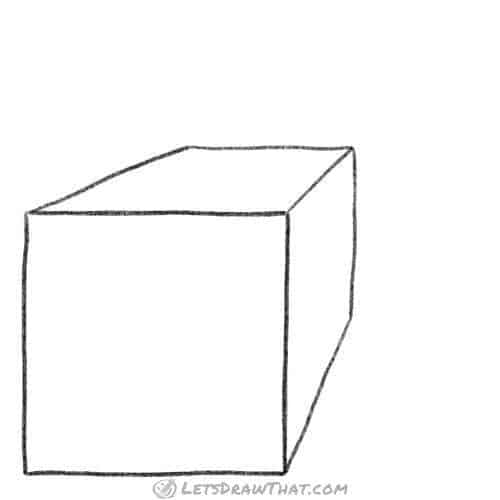
The terminal stride is to erase the vanishing point and the guidelines you drew before. Equally you lot tin can come across, the resulting cube cartoon is very similar to the simple way we have used to a higher place, just slightly more than squished. But that is what makes it await more realistic, like a real cube in space, although it is drawn on a apartment paper. And if you are upwards for a claiming, practise one-betoken perspective on drawing Halloween pumpkin faces!
Similar this tutorial? Share information technology with others:

Drawing pumpkin faces for Halloween
Drawing pumpkin faces for Halloween: three swell looking pumpkin faces and a unproblematic perspective tutorial to add depth and interest to your drawing.
How to draw a cube in two bespeak perspective

The third way how to draw a cube is using two-point perspective. Information technology uses similar guidelines to the 1 bespeak perspective above, but these merge into two unlike vanishing points. The result is a very dynamic and exaggerated view of the cube that really pops out from the flat drawing to the third dimension.
Drawing two betoken perspective cube
Pace ane: Depict the two vanishing points
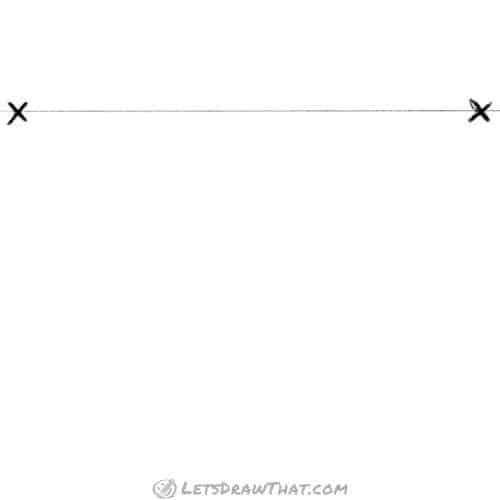
We start elementary by marker the two vanishing points. Depict a horizontal line near the height of your canvass of newspaper. So mark two points on the line near the edges, equally far as possible from i another. At that place! At present, as usual, this is your cartoon, and you tin place the line and points wherever you like. Where we take placed them for now will brand the explanation easier, since all the guidelines will be nicely visible, so for this cartoon please follow forth. The closer together you put the points, the more squished and less natural volition the cube expect, so marking the points every bit far apart as possible looks better. Placing the line up, down or in the center of the newspaper will give y'all unlike views of the cube – top, bottom or a level view. So one time you accept drawn this cube, become and experiment with your own point placement!
Step 2: Draw the front edge of the cube
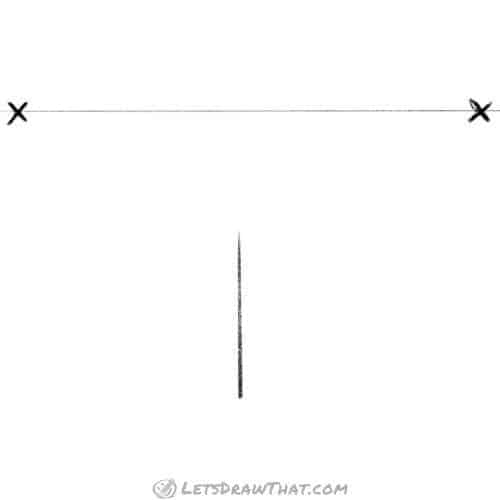
Another simple pace: Draw a straight vertical line – this will exist the front end border of the cube. Place the line in the middle of the newspaper, with a gap from the horizontal guideline. If you place the line more to the left, yous will see more than of the right side of the cube. Draw the line to the correct to see more than of the left side. Put the line further upwardly, and you will see less of the height of the cube. And if yous draw the line across the horizontal guideline, and you volition see neither top nor bottom of the cube. Come across how it works? Try information technology out once we are washed here! But to follow forth with this cartoon, identify the cube edge in the centre with a gap from the horizon.
Step iii: Describe the perspective guidelines

Now lightly draw four guidelines. Two from the top cease of our cube edge, each connected to one of the vanishing points. Then two more from the lesser of the edge, again going back to the vanishing points. Draw these directly lines with a ruler, if you take i handy.
Stride 4: Draw the outer edges of the cube
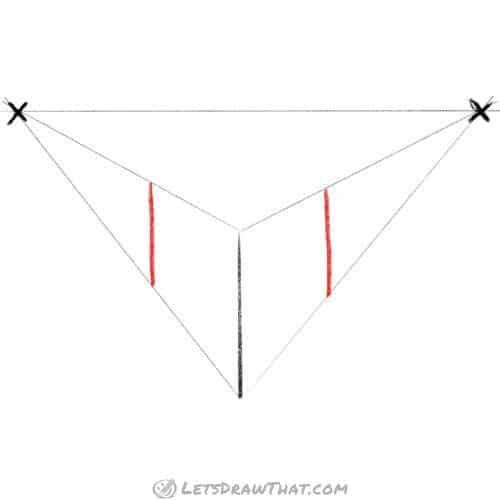
Next describe two parallel vertical lines, one on each side of the first front edge. These are the left and right edges of the cube in two indicate perspective.
Pace 5: Draw the perspective guidelines from the outer edges

Now that nosotros have the vertical edges of our cube, draw two more perspective guidelines. These once more showtime at the pinnacle terminate of our vertical cube border. The one from the right edge goes to the left perspective bespeak. The one from left edge goes to the right. That way the lines are crossing marks out the summit side of the cube. Information technology is much easier to see it on the picture that to explain it in words.
Step vi: Depict a cube from the guidelines

In this step, we merely outline the right parts of our guidelines to complete the cube drawing. First outline the bottom edge between the vertical lines. Then outline the tiptop side of the cube – four edges marked out by the perspective guidelines.
How to draw a cube in two point perspective: finished cartoon
Finished cube in 2 bespeak perspective

This is the final stride. Erase all the guidelines to make clean up your drawing. Nosotros have also added a horizontal line "behind" our cube – that suggests that the cube is laying on a tabular array or some other surface. That is all – now you can draw a cube in two point perspective. As you tin see, the result is very dynamic and expressive. If you want the bottom corner to stick out less, and get a scrap more of a natural view, just draw the centre cube edge (the very outset vertical thick line) further up and closer to the horizon. Remember all the options for starting your drawing from the step 2?
Like this tutorial? Share it with others:

mcconnellonat1989.blogspot.com
Source: https://letsdrawthat.com/how-to-draw-a-cube/
0 Response to "how to draw 3d cube 2 point perspective"
ارسال یک نظر